


RECREATING A BLOOD PRESSURE MONITOR CUFF KIT
SUMMARY:
I was part of a course in medical product design teaching the foundations of a wide variety of necessary prototyping and product design skills in the fall of 2021. These skills were applied to a semester-long design project to take a consumer blood pressure monitor cuff kit, disassemble it, sketch, document, and reconstruct various components of the device using various low to medium resolution prototyping methods. Outside expertise from soft goods to designers to machinists were brought it to assist with training throughout the semester.
DESIGN SKILLS AND EXPERIENCE GAINED:
-
Perspective and dimensioned orthographic sketching
-
BOM, exploded view, and knolled photo documentation
-
Foamcore prototyping and modeling
-
Metrology experience with digital and analog calipers
-
Laser cutting experience
-
Basic X-carve CNC experience
-
Sewing soft goods on sewing machine
-
Fusion 360 experience
-
3D-printer and printing software experience
-
Silicone molding and vacuum molding
-
Basic lathe turning experience
-
Basic Milling experience
-
Vinyl Cutting experience
CLASS INFORMATION:
-
Class: BIOENG 1024
-
Class Professor: Brandon Barber, Dr. Mark Gartner, Daniel Yates
Purpose of Project
The purpose of BIOENG 1024 is to gain hands-on experience utilizing tools and techniques used in medical product design and prototyping and in product design in general. By recreating various components of a blood pressure monitor (BPM) and cuff kit, I am applying various product design and prototyping skills and techniques.
Recreating the BPM Housing
The process began with sketching and taking dimensions of the BMP housing using dial calipers. Developing orthographic sketches for more technical drawing experience as well as getting two-point perspective drawing experience was focused on at this point. The perspective drawing would ease into doing a two-point perspective exploded view sketch of the BPM housing.

This is an exploded view sketch of the BPM housing with all components labeled in Two-point perspective.

This is a dimensioned orthographic sketch of the BMP housing.

This is a two-point perspective sketch of the BPM housing with overall dimensions.
This is an exploded view sketch of the BPM housing with all components labeled in Two-point perspective.
To assess all components of the BPM housing, a bill of materials (BOM) was created along with a knelled photo of the housing and all its internal components as shown below.

Knolled Photo of BMP Housing and All Internal Components
Knolled Photo of BMP Housing and All Internal Components
To gain experience with using foamcore and creating low-resolution prototypes and models out of foam core, I recreated the BMP housing at a 2:1 scale out of foam core.
Model Scale is 2:1.
Model Scale is 2:1.
To gain basic machining experience, two internal components, the air pump and the LCD screen were dimensioned, sketched, and machined. I machined the air pump on a turning lathe and I machined the LCD screen on a milling machine.

Machined on Turning Lathe

Machined on Turning Lathe

Machined on Milling Machine
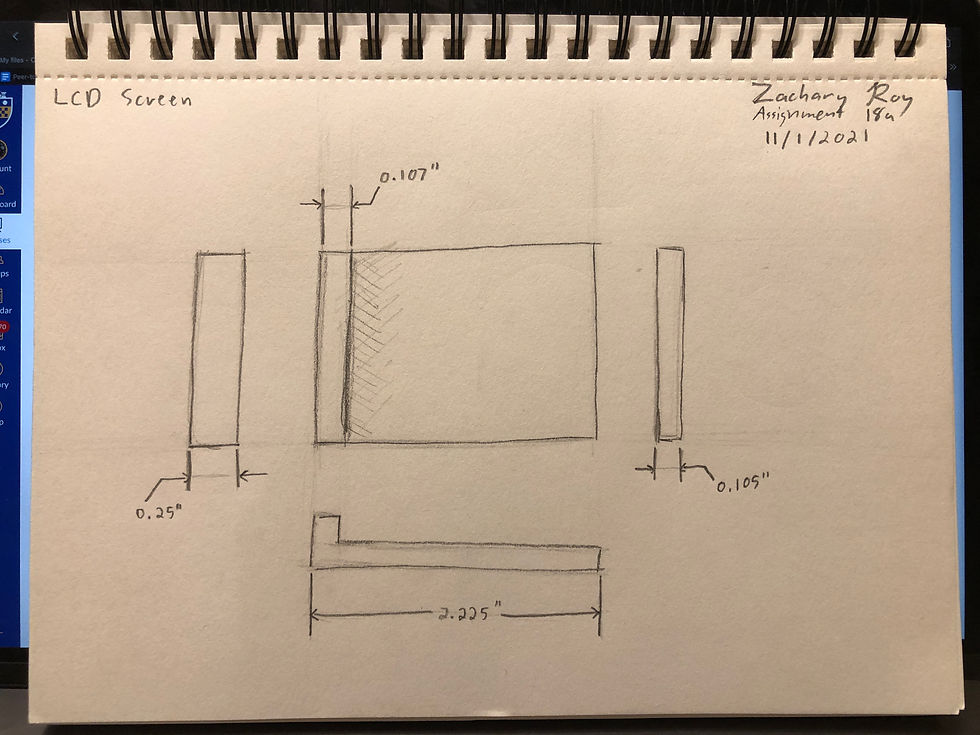
Machined on Milling Machine

First step of process


Final Step of process
First step of process
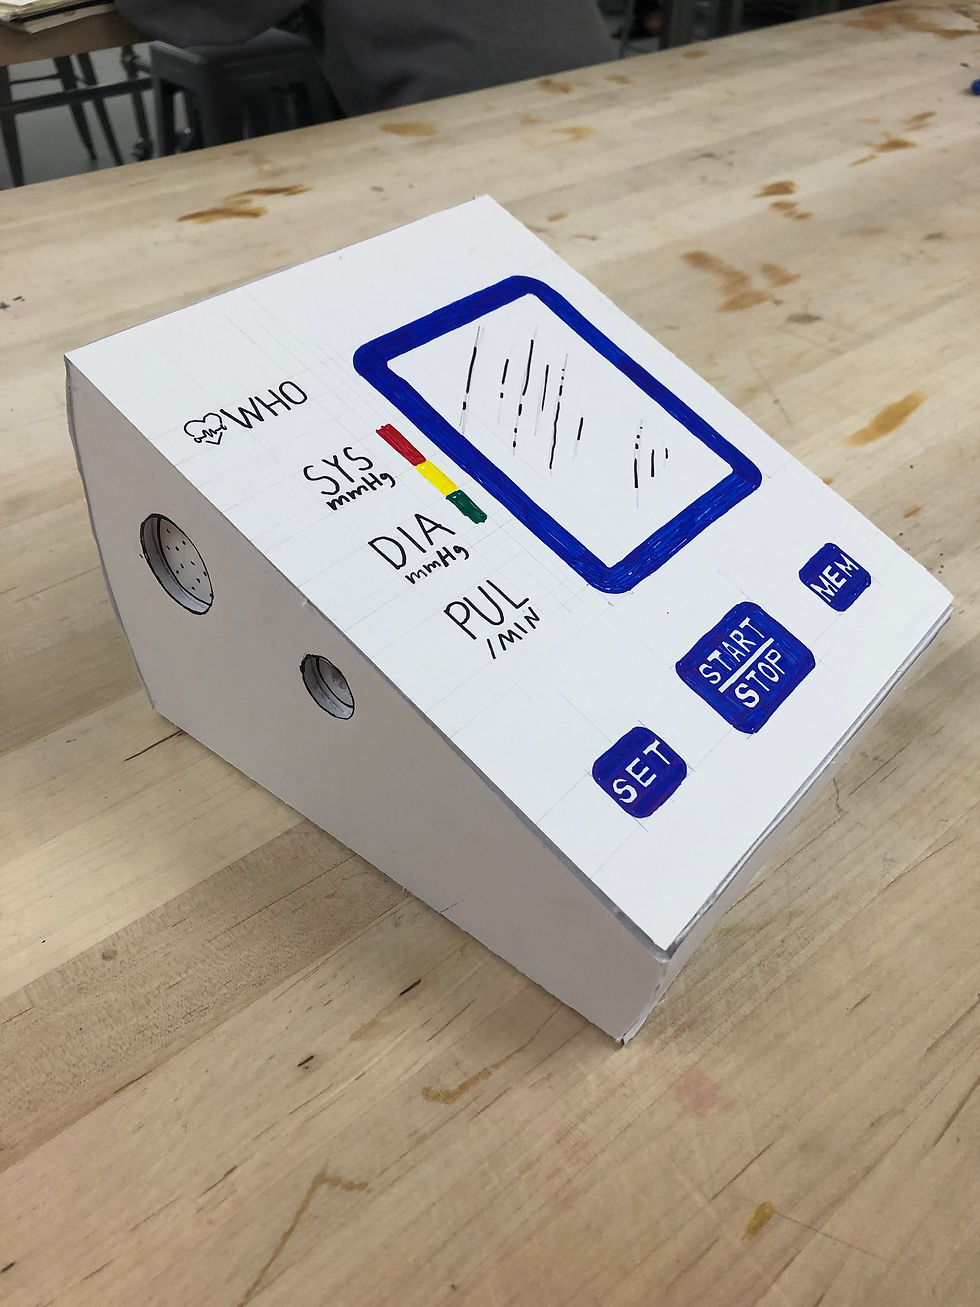
To fabricate the front panel of the BMP housing, a piece of acrylic was laser cut from a sheet and a vinyl decal was applied. The decal was created by modifying a template and cut via a vinyl cutter in the Pitt Makerspace (innovation workshops). The fabricated front plate was finally inserted into the fabricated housing.
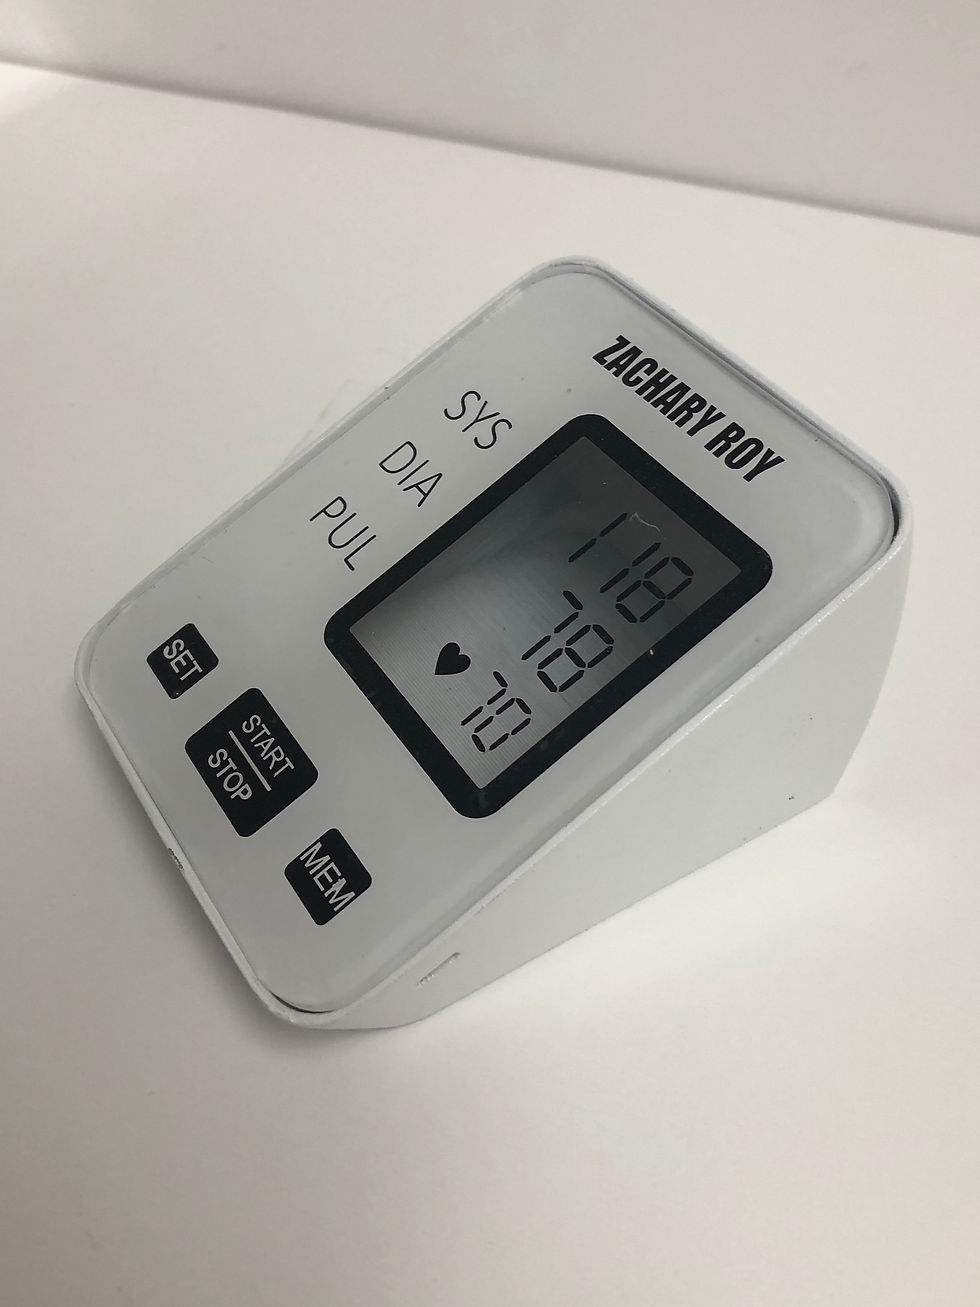
Fabricated front plate inserted into fabricated housing

White spraypaint was also applied to the back of the panel except the LCD screen cutout.

Fabricated front plate inserted into fabricated housing
Recreating the BPM Arm Cuff


This process began with disassembling the BPM cuff with a seam ripper. The BPM cuff was composed of two strips of fabric with an internal air bag, two strips of velcro, two internal stabilizing pieces, a metal tightening ring, an air tube that connects the cuff to the housing, and the fabric strip that hid the raw perimeter edge of the cuff. All these components were captured in a knolled photo.

Dimensioned sketches were captured of all components of the BMP cuff. I then laser cut a sheet of Nylon fabric in the shape of the BPM cuff band with a hole for the air bag. The new BPM cuff band, edging fabric, and all old components were then sewn back together with a sewing machine.
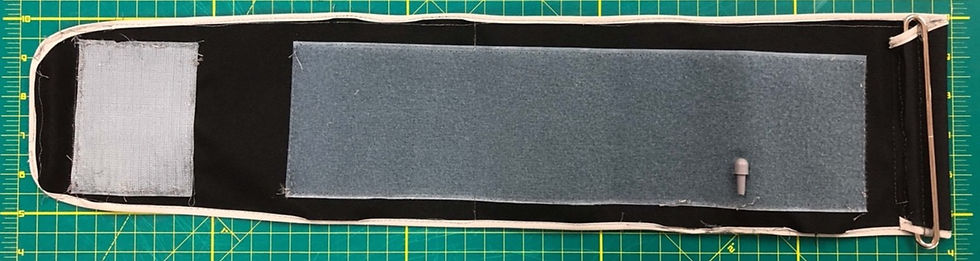
Sewn back together with the same components except cloth band and cuff cloth edging via sewing machine

Sewn back together with the same components except cloth band and cuff cloth edging via sewing machine
Sewn back together with the same components except cloth band and cuff cloth edging via sewing machine
Additional Practices and Finishing Up
To get experience with vacuum molding, I had recreated plastic blister pack for the BMP housing and cuff using provided molds.

Original BPM Housing and Fabricated Cuff in Vacuum Molded Packaging
Original BPM Housing and Fabricated Cuff in Vacuum Molded Packaging